Create structured presentations in LaTeX containing a title page, table of contents, lists, figures, tables, blocks, and much more!
Contents :
1. Minimal code of a LaTeX presentation
The minimal code of a LaTeX presentation includes: 1) loading the beamer class package, 2) choosing a default presentation theme and a frame.
Here is an example:
% Quick start guide
\documentclass{beamer}
\usetheme{default}
\begin{document}
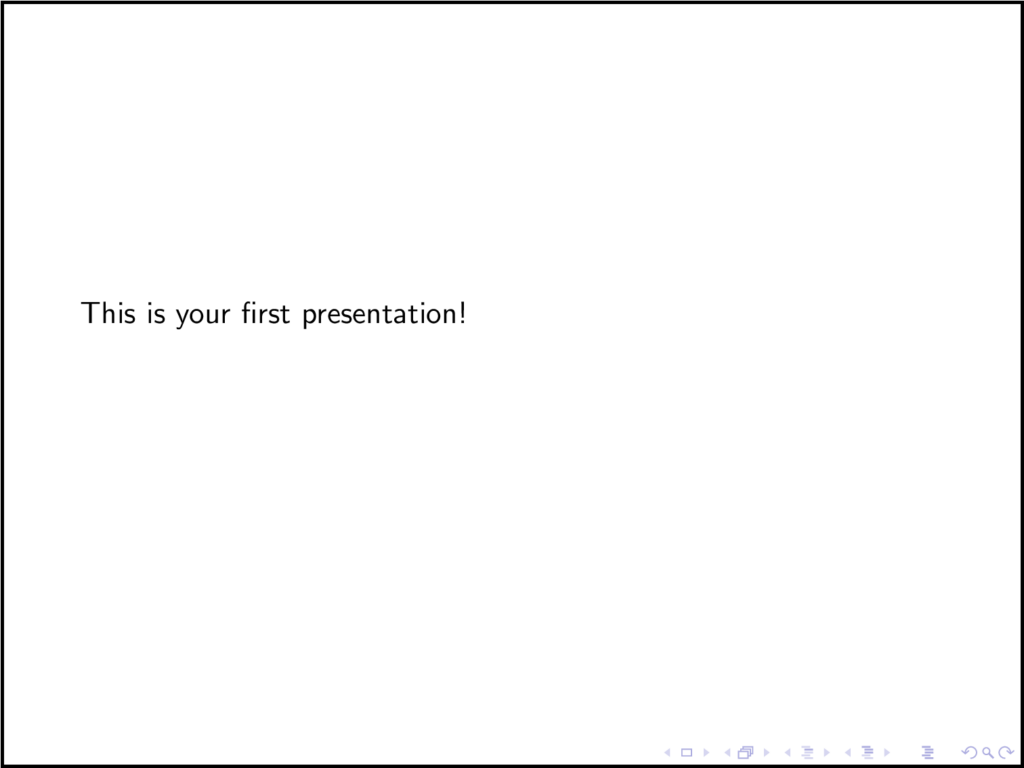
\begin{frame}
This is your first presentation!
\end{frame}
\end{document}
Comments:
- Like every LaTeX document, we should specify document class which corresponds to ’beamer’.
- The Beamer class comes with several slide themes which can be used to change the color and layout of the slides. We will use the default theme throughout this guide. I will do a lesson on themes later in the detailed tutorial, but the theme is not our concern at the moment.
- To create a slide, we use the frame environment and put details inside it. In this example, it is just a one line of text!
Compiling this code yields to a basic slide:
Let’s try now to create a simple title page.
2. Creating a simple title page
To create a title page, the first thing to do is to add the title and subtitle of the presentation, the name of the author, the institute and the date. After that, we create a frame environment and we use \titlepage to print the provided details.
Here is a simple example:
% Quick start guide
\documentclass{beamer}

\usetheme {default}

% Title page details
\title{\LaTeX{} Beamer introduction}
\subtitle{Quick-start guide}
\author{latex-beamer.com}
\institute{Online Education}
\date{\today}

\begin{document}

\begin{frame}
% Print the title page as the first slide
\titlepage
\end{frame}

\end{document}
Compiling this code yields:

3. Add a logo in Beamer
Adding a logo to beamer presentations can be done easily using the \logo{Text} command. Between braces, we can add text or an image using \includegraphics[options]{ImageName} command.
Here is an illustrative example:
% Quick start guide
\documentclass{beamer}

\usetheme {default}

% Title page details
\title {\LaTeX{} Beamer introduction}
\subtitle{Quick-start guide}
\author{latex-beamer.com}
\institute{Online Education}
\date{\today}

% Image Logo
\logo{\includegraphics[width=2.5cm]{Beamer-Logo.png}}

\begin{document}

\begin{frame}
% Print the title page as the first slide
\titlepage
\end{frame}

\end{document}
Compiling this code yields:
For more details about adding and positioning a logo in Beamer, check this lesson!
4. Presentation Outline
– Table of contents command
The \tableofcontents command creates the table of contents as it did in LaTeX. The table automatically gets updated with the addition or removal of sections and subsections. We have to create a frame environment and we add the command in question.
% ....
% Presentation outline
\begin{frame}{Outline}
    \tableofcontents
\end{frame}
% ...
– Hide subsections
This command will display all sections and subsection(if any) in the table of contents. To display only sections titles’ we add the option [hideallsubsections] in squared brackets to the \tableofcontents command as follows:
% Presentation outline
\begin{frame}{Outline}
\tableofcontents[hideallsubsections]
\end{frame}
– Recurring table of contents
It is also possible to create a recurring table of contents before every section. This highlights the current section and fades out the rest. This feature is used to remind the audience of where we are in the presentation. This can be done with the help of \AtBeginSection command and specifying [currentsection] in the \tableofcontents command. Please go through the example below for better understanding:
% Presentation outline
\begin{frame}{Outline}
    \tableofcontents[hideallsubsections]
\end{frame}

% Current section
\AtBeginSection[ ]
{
\begin{frame}{Outline}
    \tableofcontents[currentsection]
\end{frame}
}
5. Lists in beamer
Let’s discuss these environments in detail:
– Itemize environment
Itemize is used to create unordered lists. Under this environment, the obtained list will have bullet points. Check the following code:
% ...
% Lists in beamer (Itemize)
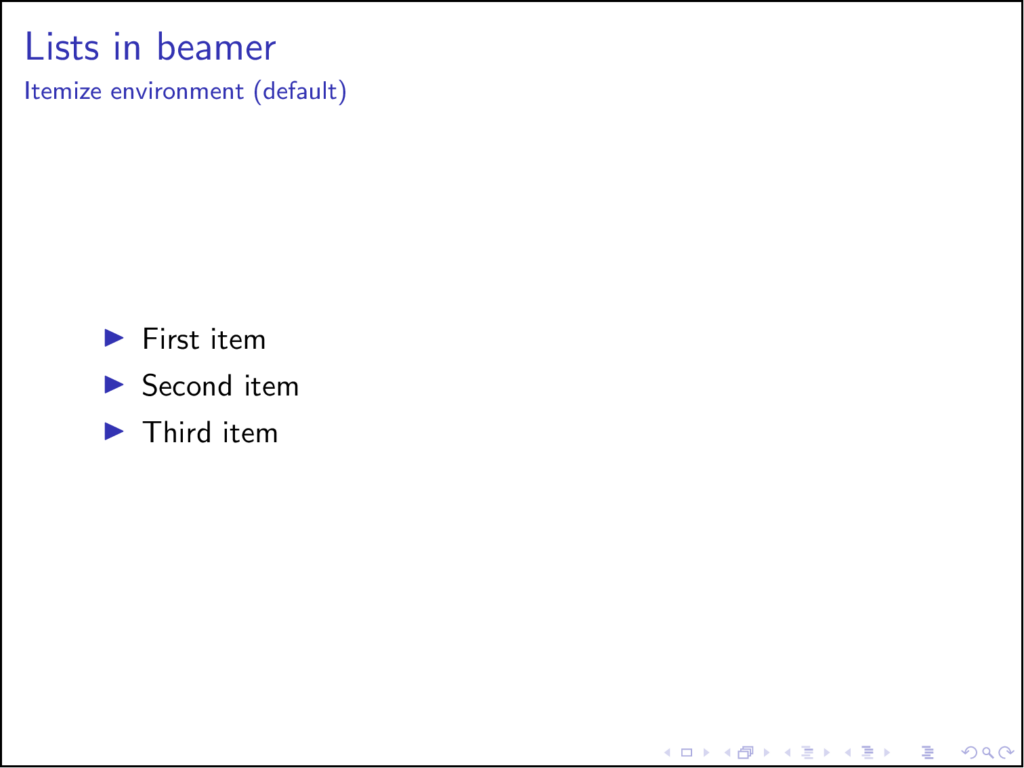
\begin{frame}{Lists in beamer}{Itemize environment (default)}
\begin{itemize}
\item First item
\item Second item
\item Third item
\end{itemize}
\end{frame}
which yields the following:
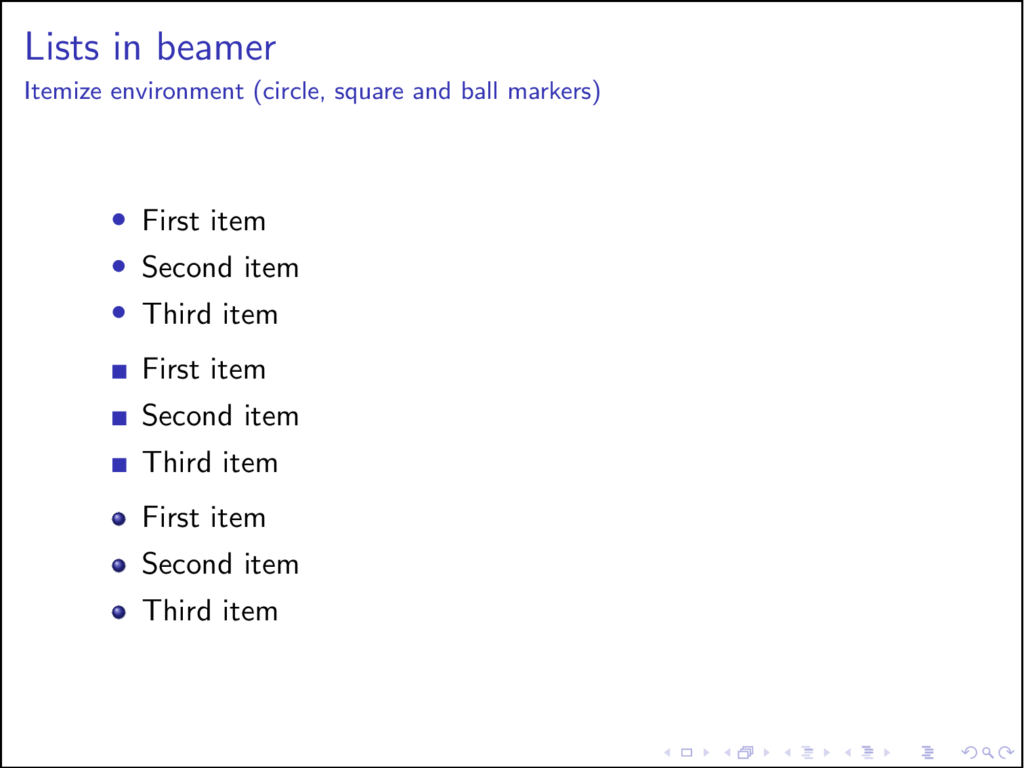
There are various templates in beamer to change this itemized list appearance. The command \setbeamertemplate is used on itemize items to change the shape of item markers.
\setbeamertemplate{itemize items}[default]: the default item marker is a triangle.\setbeamertemplate{itemize items}[circle]: sets the item marker to a small filled circle.\setbeamertemplate{itemize items}[square]: sets the item marker to a small filled square.\setbeamertemplate{itemize items}[circle] :sets the item marker to a ball shape.
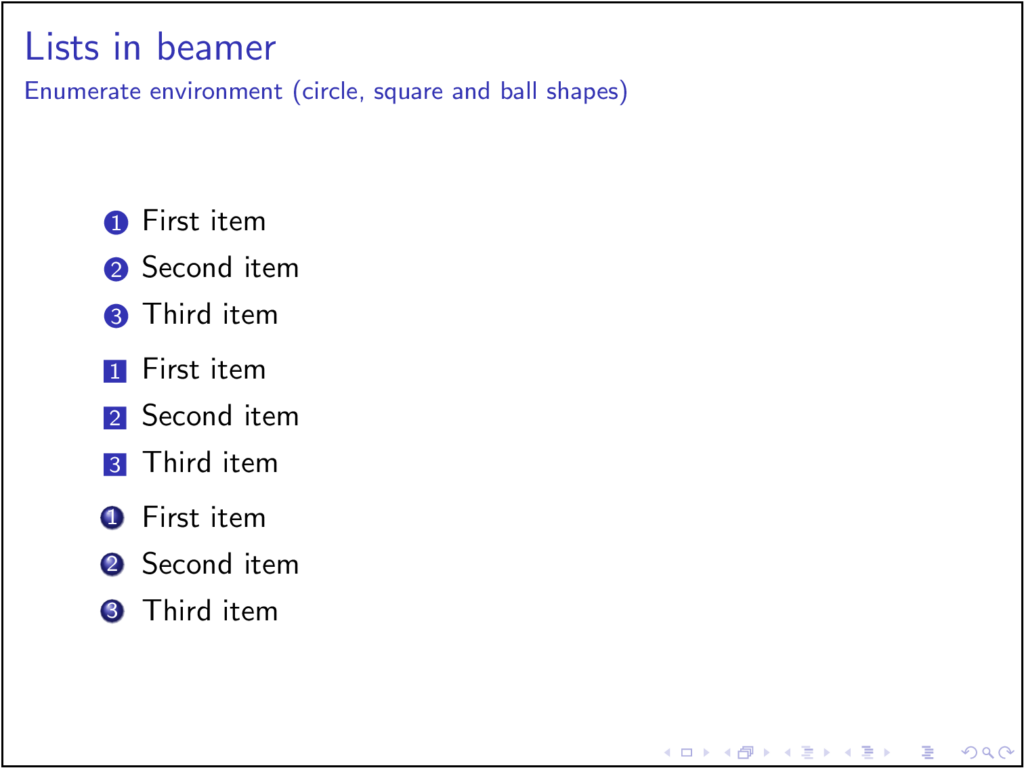
– Enumerate environment
This environment is used to create an ordered list. By default, before each item increasing Arabic numbers followed by a dot are printed (eg. “1.” and “2.”).
Here is an example:
% Ordered Lists in beamer
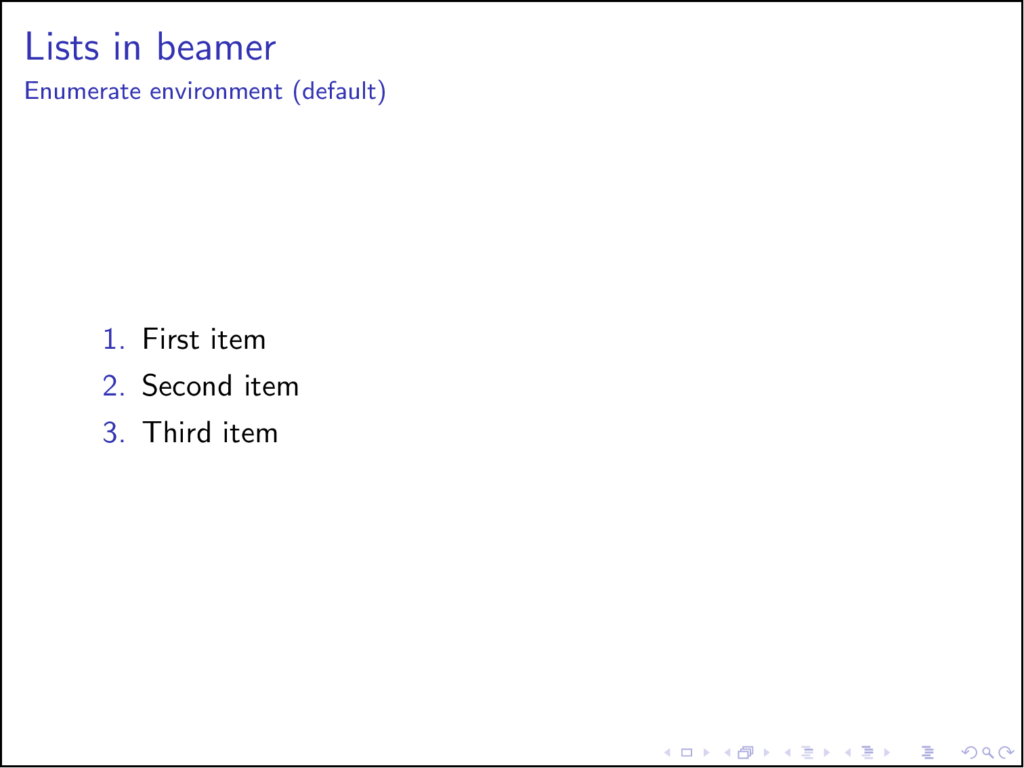
\begin{frame}{Lists in beamer}{Enumerate environment (default)}
\begin{enumerate}
\item First item
\item Second item
\item Third item
\end{enumerate}
\end{frame}
Similar to itemize items, we can change the enumerate style by placing numbers inside different shapes using \setbeamertemplate and instead of itemize items we use enumerate items:
\setbeamertemplate{enumerate items}[circle]: place the number inside a small filled circle.\setbeamertemplate{enumerate items}[square]: place the number inside a small filled square.\setbeamertemplate{enumerate items}[circle]: place the number inside a ball shape.
The list looks like the following:
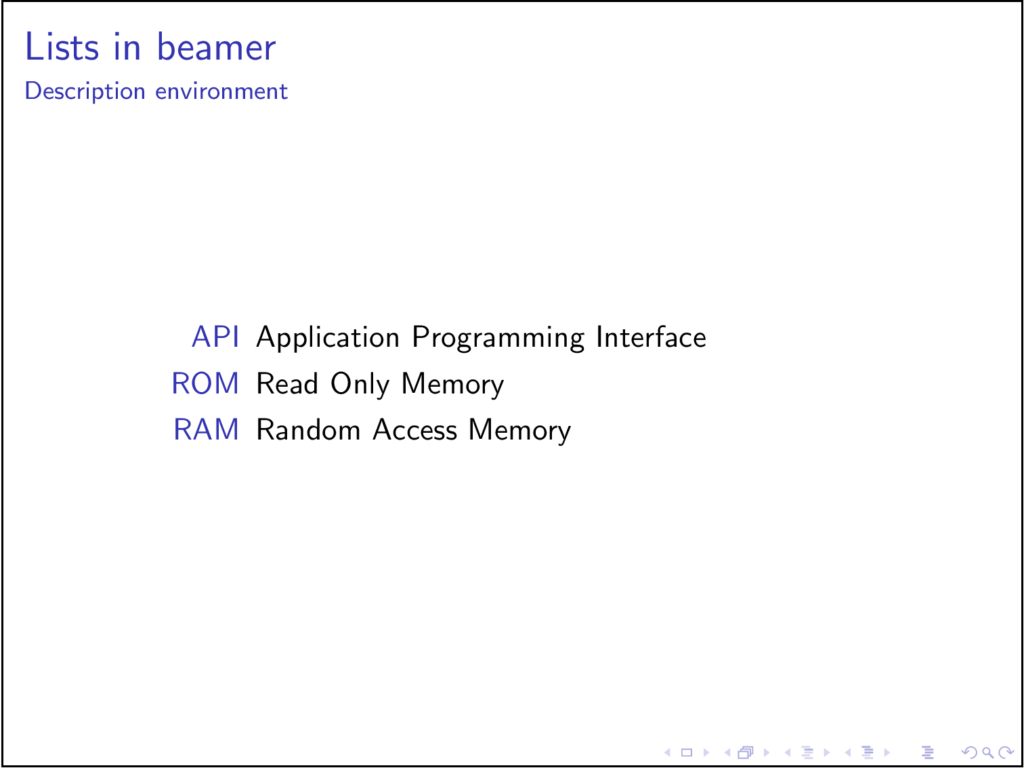
– Description environment
The description environment is used to define terms or to explain acronyms. We provide terms as an argument to the \item command using squared bracket.
Here is an example:
% ...
% Description Lists in beamer
\begin{frame}{Lists in beamer}{Description environment}
\begin{description}
    \item[API] Application Programming Interface
    \item[ROM] Read Only Memory
    \item[RAM] Random Access Memory
\end{description}
\end{frame}
Compiling this piece of code yields:
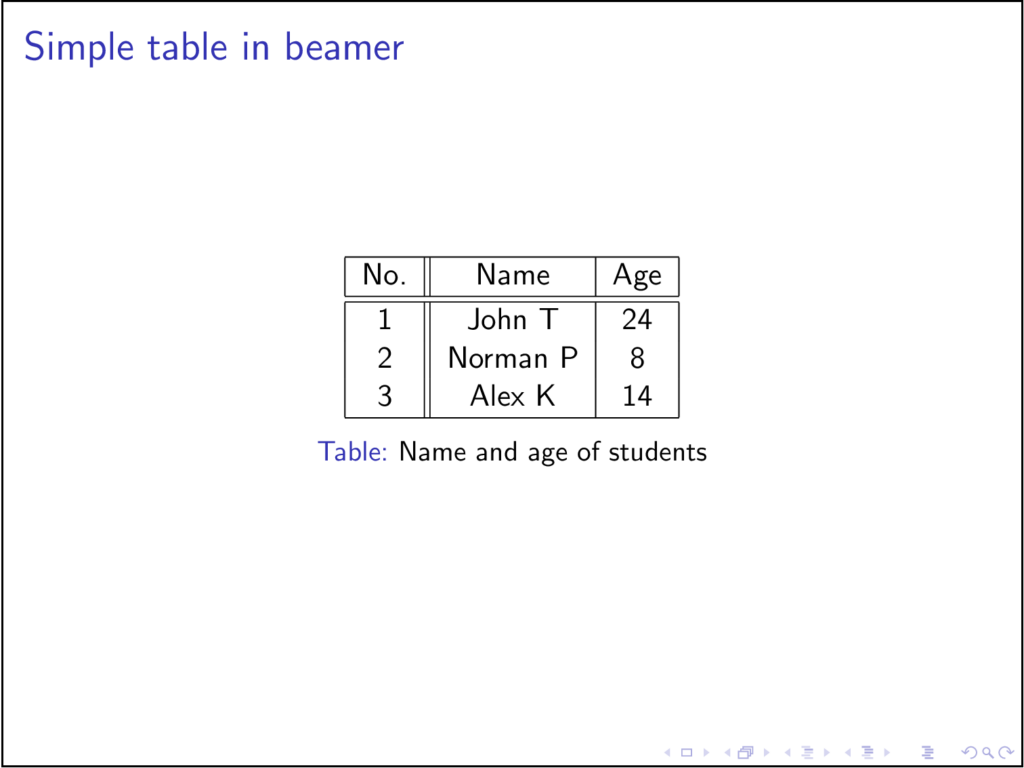
6. Tables and Figures
Tables and figures are created pretty much the same way as it is in LaTeX. Check the following code:
% Tables in beamer
\begin{frame}{Simple table in beamer}
\begin{table}
\begin{tabular}{| c || c | c |}
    \hline
    No. & Name & Age \\
    \hline \hline
    1 & John T & 24 \\
    2 & Norman P & 8 \\
    3 & Alex K & 14 \\
    \hline
\end{tabular}
\caption{Name and age of students}
\end{table}
\end{frame}
Compiling this code with the minimal code of a LaTeX presentation presented above yields:
Figures can be included in a beamer presentation using the figure environment. The image can be simply inserted using the \includegraphics command, since beamer already includes the graphicx package in it. The size and the label of the image can be set using the scale option and \caption command respectively.
% Figures in beamer
\begin{frame}
\begin{figure}
    \includegraphics[scale=0.5]{Beamer}
    \caption{Beamer presentation}
\end{figure}
\end{frame}
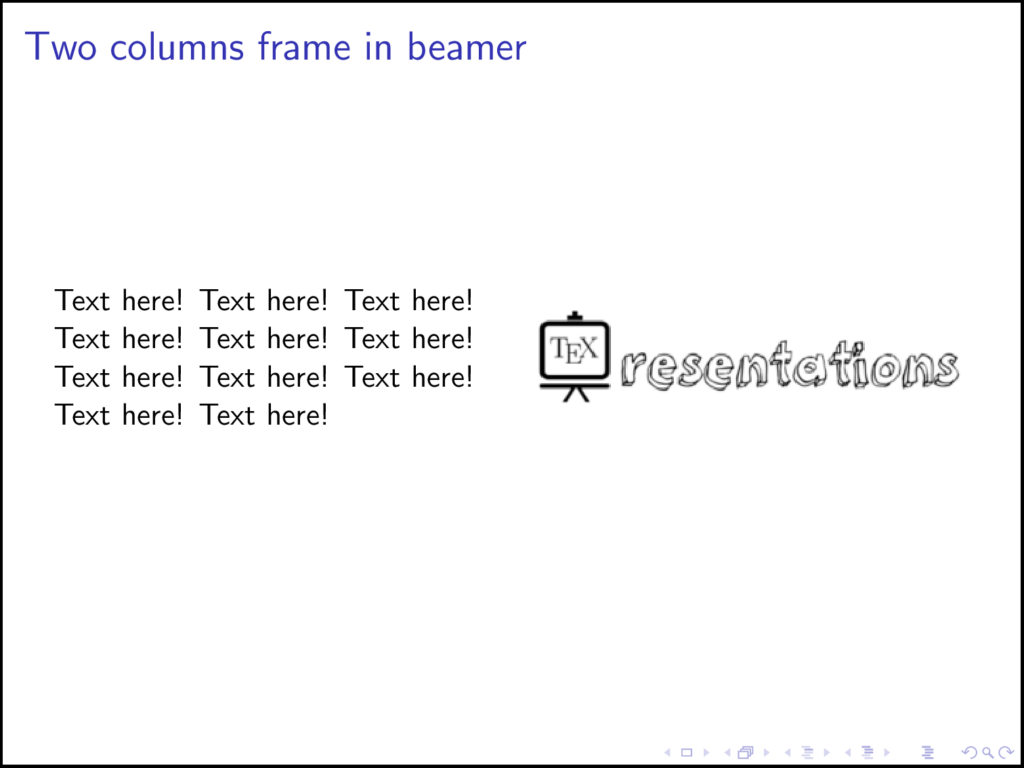
7. Creating columns in beamer
Columns can be created in beamer using the environment named columns. Inside this environment, you can either place several column environments, each of which creates a new column, or use the \column command to create new columns.
Here is an illustrative example:
% Multicolumn frame in beamer
\begin{frame}{Two columns frame in beamer}

\begin{columns}
% Column 1
\begin{column}{0.5\textwidth}
    Text here! Text here! ...
\end{column}

% Column 2
\begin{column}{0.5\textwidth}
    \includegraphics[scale=0.5]{Beamer-Logo.png}
\end{column}
\end{columns}

\end{frame}
Under the columns environment, the column environment is to be entered along with column width to text width ratio specified in curly brackets. This ratio is generally taken as 0.5. However, it can be customized as per the requirements, check this example:
8. Blocks in beamer
Information can be displayed in the form of blocks using block environment. These blocks can be of three types :
- alert block.
- example block.
- and theorem block.
– Standard block
The standard block is used for general text in presentations. It has a blue color and can be created as follows:
% Blocks in beamer
\begin{frame}{Blocks in beamer}{}
\begin{block}{Block 1}
This is a simple block in beamer.
\end{block}
\end{frame}
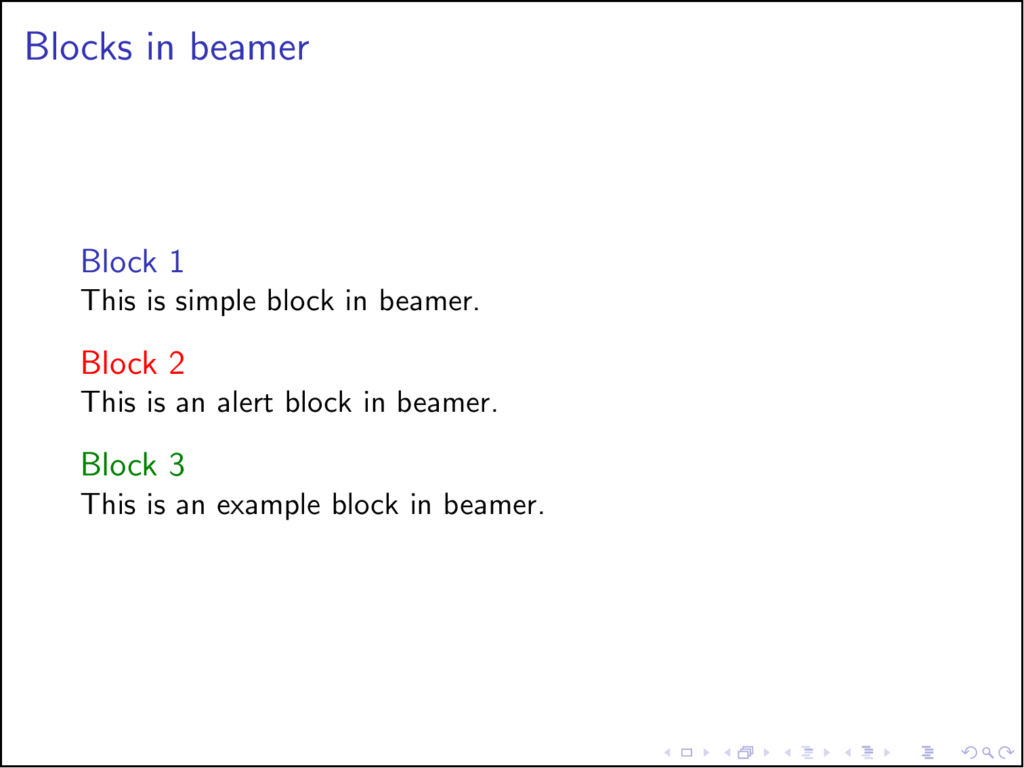
– Alert block
The purpose of the alert block is to stand out and draw attention towards the content. This block is used to display warning or prohibitions. The default color of this block is red. To display an alert block the code can be written as:
% Blocks in beamer
\begin{frame}{Blocks in beamer}{}
\begin{alertblock}{Block 2}
This is an alert block in beamer.
\end{alertblock}
\end{frame}
– Example block
This block is used to highlight examples as the name suggests and it can also be used to highlight definitions. The default color of this block is green and it can be created as follows:
% Blocks in beamer
\begin{frame}{Blocks in beamer}{}
\begin{exampleblock}{Block 3}
This is an example block in beamer.
\end{exampleblock}
\end{frame}
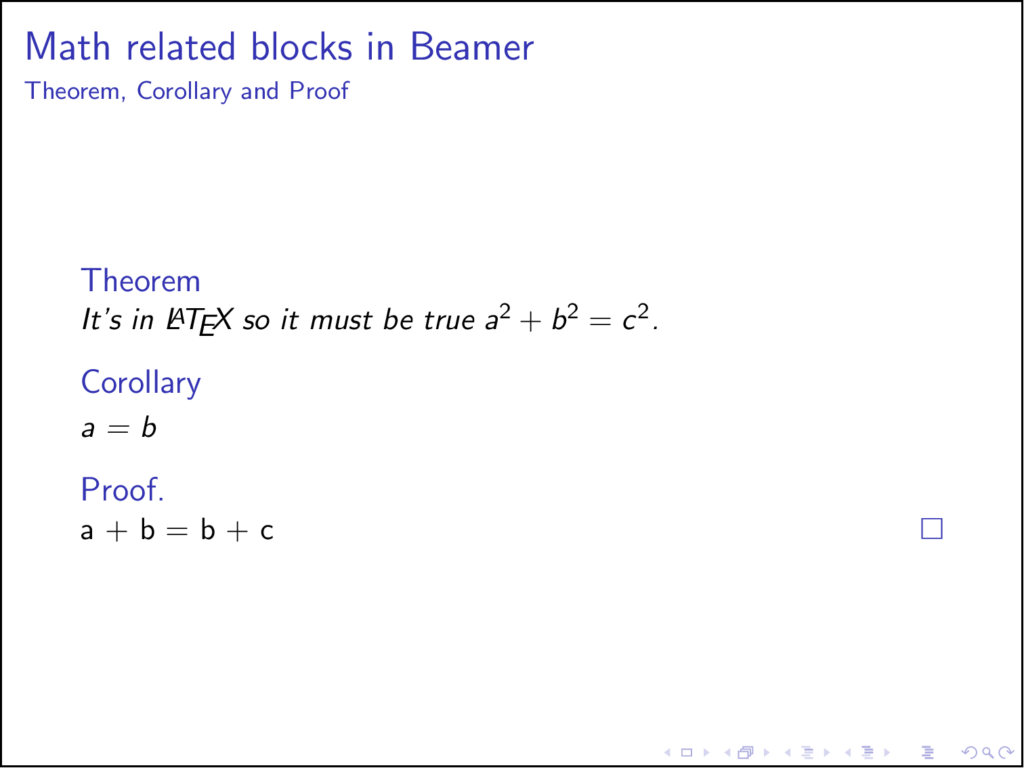
– Theorem Block
The theorem block is used to display mathematical equations, theorems, corollary and proofs. The color of this block is blue. Here is an example:
% Blocks in beamer
\begin{frame}{Math related blocks in Beamer}{Theorem, Corollary and Proof}

\begin{theorem}
    It's in \LaTeX{} so it must be true $ a^2 + b^2 = c^2$.
\end{theorem}

\begin{corollary}
    a = b
\end{corollary}

\begin{proof}
    a + b = b + c
\end{proof}

\end{frame}
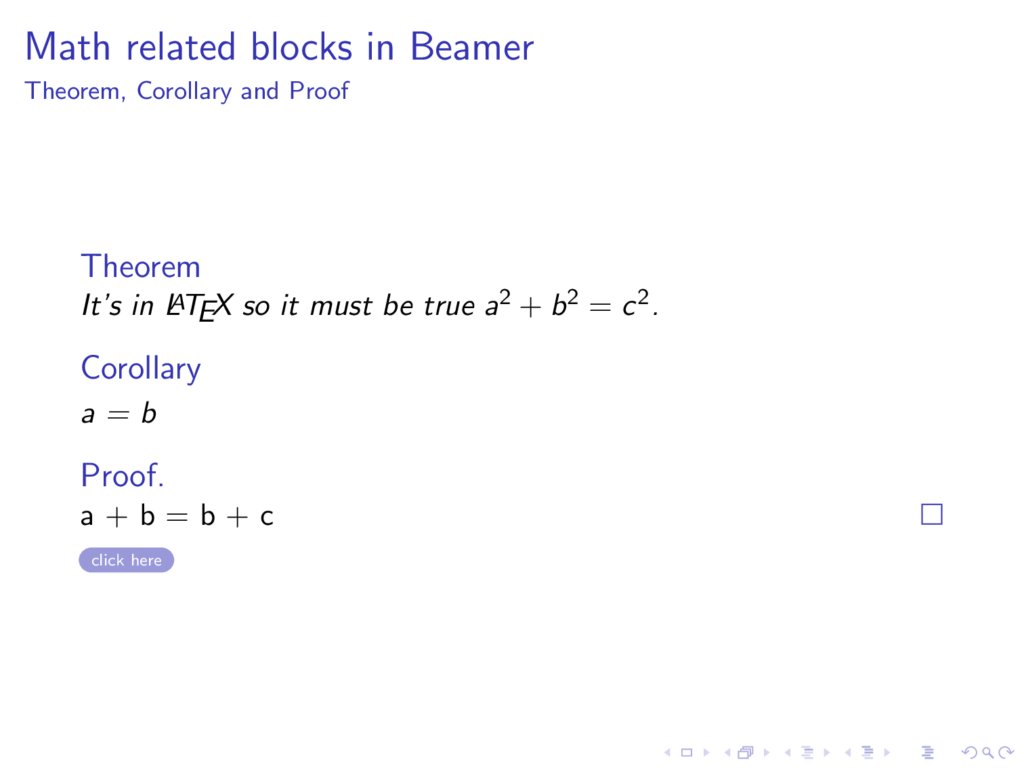
9. Hyperlinks and Buttons
To create jumps from one slide to another slide in our talk, we can add hyperlinks to our presentation. When the hyperlink is clicked it jumps the presentation to the target slide. This can be achieved in beamer by following these steps:
- Tag the frame that we want to link to by adding
\label{targetFrame}or\hypertargetcommands. - Create a hyperlink text using the command:
\hyperlink{targetFrame}{click here} - If you would like to create a button style, put “click here” inside the command
\hyperlink{contents}{\beamerbutton{click here}}

We reached the end of this quick guide to LaTeX presentations. If you would like to go into details, check the beamer free course!