1. Absolute coordinates of a frame
The following illustration shows different coordinates of a frame that can be used for absolute positioning of an image using TikZ, check this tutorial for more details!
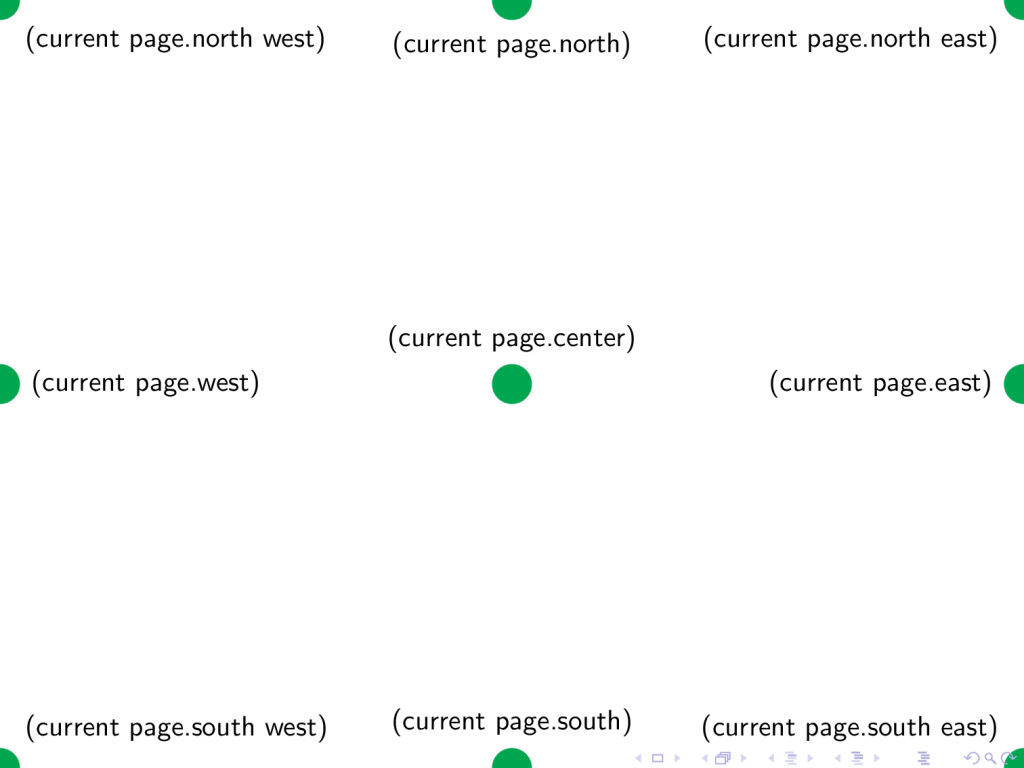
Moreover, we can access the frame border using angles (this has been used for logo positioning in this lesson!) as shown below:

2. Exact image positioning in Beamer
The following code highlights the idea of absolute positioning of an image in Beamer using TikZ package (download nature3.jpg):
% Exact image positioning in Beamer
\documentclass{beamer}
% Required package
\usepackage{tikz}
\begin{document}
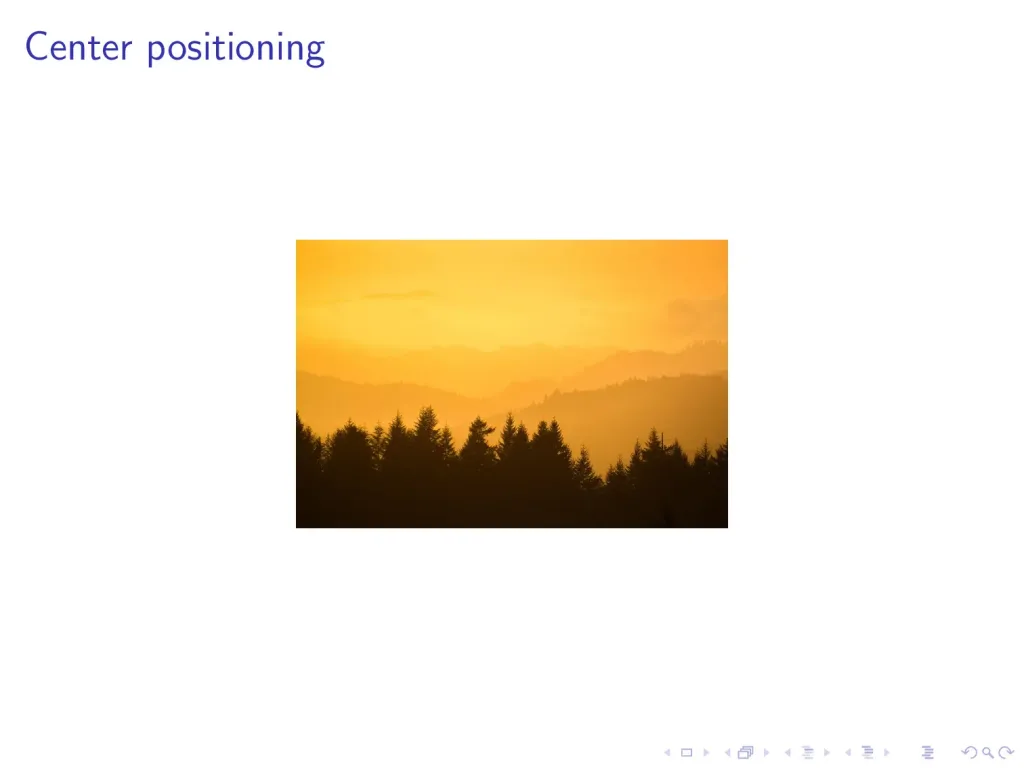
\begin{frame}{Center positioning}
% create TikZ picture environment
\begin{tikzpicture}[remember picture, overlay]
\node[] at (current page.center)
{
\includegraphics[width=0.5\textwidth]{Nature3.jpg}
};
\end{tikzpicture}
\end{frame}
\end{document}
Comments:
- We loaded the TikZ package using the command:
\usepackage{tikz} - We created a TikZ environment inside a frame that we would like to add an image to it. This is achieved by
\begin{tikzpicture}[remember picture, overlay] ... \end{tikzpicture} - The parameters of the TikZ environment
[remember picture, overlay]allows us to work on the frame and use absolute positioning. - We created a node at the center of the frame,
(current page.center), which has an image a content.
Compiling the above code yields:

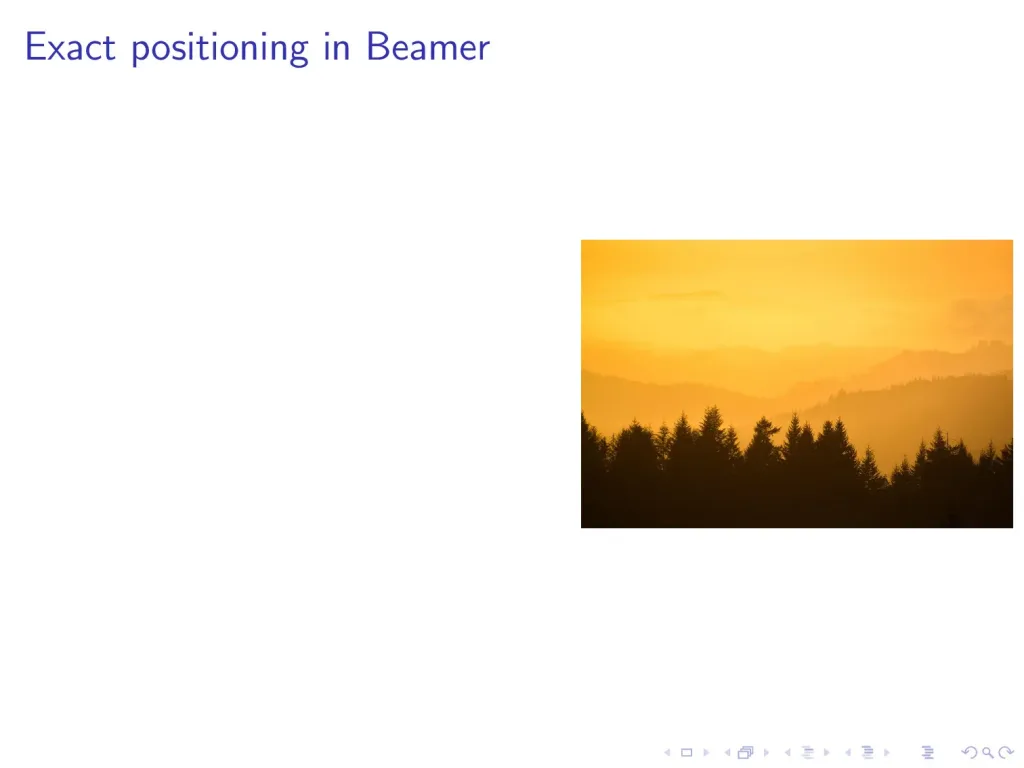
3. Use left, right, below and above for relative positioning
Now, once you add an image at an absolute position of the frame, you can move it to different directions with respect to the absolute coordinate by adding one of these options: left, right, below or above to the node command!
So to solve the above issue, we can add left option, relative to (current page.east), to the node command:
%  Exact image positioning in Beamer
\documentclass{beamer}

% Required package
\usepackage{tikz}

\begin{document}

\begin{frame}{Center positioning}

% create TikZ picture environment
\begin{tikzpicture}[remember picture, overlay]

\node[left] at (current page.east)
{
    \includegraphics[width=0.5\textwidth]{Nature3.jpg}
};

\end{tikzpicture}

\end{frame}

\end{document}
This code yields the following output:
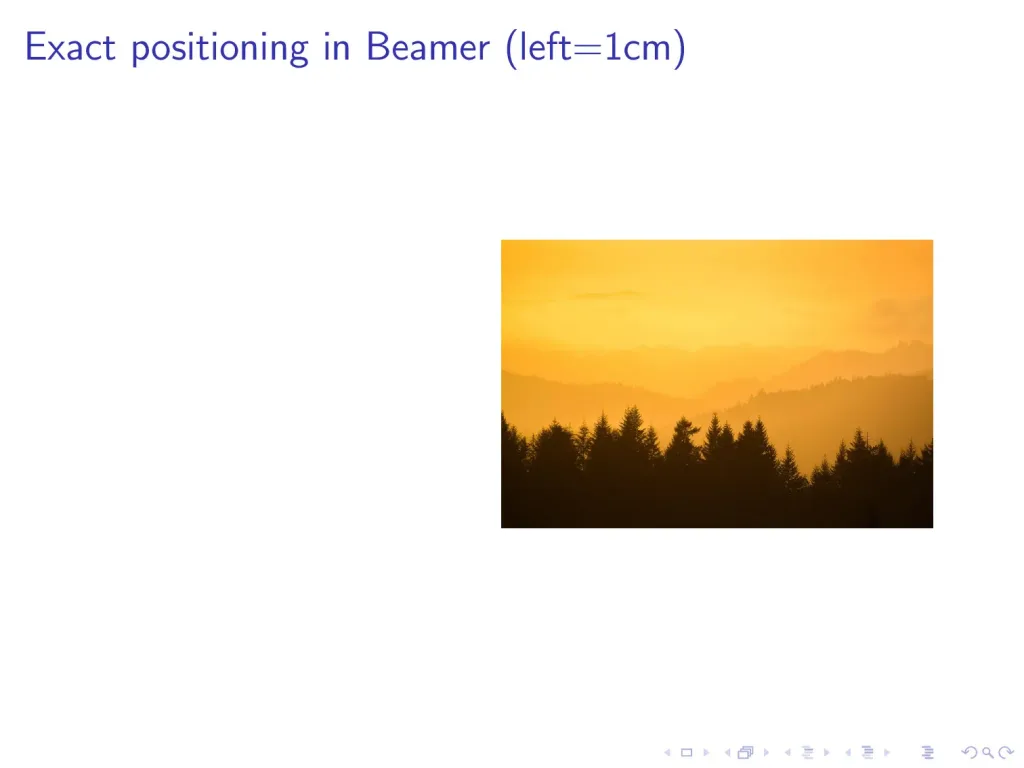
You can also specify how much left distance by using left=<value> instead of left. Consider the above code with left=1cm, we get the following:
You can do the same with right, below and above parameters!
If you find the tutorial useful, PLEASE share it with your colleagues!